• Home
    • Agave
    • Flora
    • Butterflies 1
    • Butterflies 2
  • Workshops
  • Blog
  • Contact
Menu

LAJphotos

Photographing the beauty of the Southwest garden one agave stalk at a time...
  • Home
  • Galleries
    • Agave
    • Flora
    • Butterflies 1
    • Butterflies 2
  • Workshops
  • Blog
  • Contact
×

Gardenography by LAJphotos Blog

ORC-Gold-250w.png

One Room Challenge: Week 6 - Cactilicious Kitchen REVEAL

Lori A. Johnson November 27, 2020

Finally, it’s my Cactilicious Kitchen reveal! The six weeks of the One Room Challenge™ flew by, and while a few things remain to be finished at a later date, my extreme budget kitchen makeover more than lived up to my expectations. The centerpiece and color inspiration for everything else is my custom pop art cactus blossom wall mural. Cactilicious, indeed!

I created this custom pop art wall mural based on my own photo to spruce up this tiny galley kitchen!

I created this custom pop art wall mural based on my own photo to spruce up this tiny galley kitchen!

If you recall from Week One, I originally intended to use a commercially available wallpaper, but for various reasons, was never quite satisfied with any particular design. It had to somehow account for the existing black countertops and appliances, as well as the terracotta tile floors, but also bring in cactus blossoms in a bold way. There were a lot I liked, but none felt right, so I decided to create my own custom wallpaper based on one of my own original photos and my pop art mural was born.

I shared more details about how I created the mural in Week Four’s post, but I knew my friends at Image Craft would be able to make my file come to life. They recommended Photo Tex peel and stick for the media and not only printed it on their state-of-the-art large format printers, but also installed it for me after I chickened out on making the cuts around countertops and cabinets. I’m so glad I had their expert installers do it, as the application is precise and flawless – and unlike if I’d tried it myself, there was no cursing involved!

Space where the wine fridge used to be has a temporary solution!

Space where the wine fridge used to be has a temporary solution!

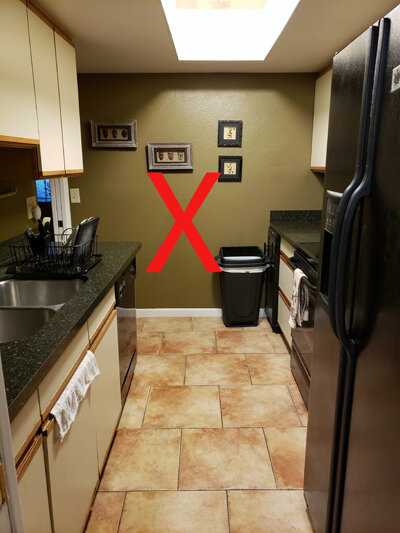
If you read my prior posts, you know I had originally intended to add a new base cabinet to fill in the space where my old wine fridge was, then repair the missing tile in front of it. Well, it turns out the handyman that helped me with the ceiling fixture back in September tested positive for COVID last week right before he was due to help me with cabinet installation, so I filled in the space with a temporary solution until he sufficiently recovers. On Amazon I found a black 24” x 36” silicone dog feeding mat, of all things, that fit perfectly inside the space to cover the concrete floor, then I hid the broken tile just outside the space with a black anti-fatigue mat I found at Walmart for under $14 (they are significantly higher everywhere else). Once the tile is finally replaced, I can move the mat to the sink area. At Home Depot, I found a basic black kitchen trash can with lid to slide underneath, then decided to stick on one of the wallpaper samples I had received from Spoonflower to spruce it up just a hair.

Luckily, everything else went according to plan, including the tedious job of painting cabinets, which I outlined in a previous post. Follow me on Instagram (@LAJphotos) for further updates and be sure to check out my “ORC” Highlight for more on the project. Meanwhile, see individual photo captions below for more information and a list of sources at the end.

I made a few custom items at Zazzle, including this kitchen towel!

I made a few custom items at Zazzle, including this kitchen towel!

Coordinating mug, also from Zazzle!

Coordinating mug, also from Zazzle!

Fridge magnets from Zazzle - larger one doubles as a whiteboard!

Fridge magnets from Zazzle - larger one doubles as a whiteboard!

Mixtiles from my own agave photos stick to the wall without damage.

Mixtiles from my own agave photos stick to the wall without damage.

Cute face pot by my friend and ceramic artist, Deborah Robin. Mosaic tray is vintage.

Cute face pot by my friend and ceramic artist, Deborah Robin. Mosaic tray is vintage.

Sink side overview - peel and stick backsplash tile went on easily.

Sink side overview - peel and stick backsplash tile went on easily.

Sink side looking towards the wall mural. There’s an exit at each end.

Sink side looking towards the wall mural. There’s an exit at each end.

Cactus mason jars from a dollar store; I added pump lids and filled with soap (lotion is really hand sanitizer, but the labels came with the lids, so I played along). Cactus dish by Sandy Siegel.

Cactus mason jars from a dollar store; I added pump lids and filled with soap (lotion is really hand sanitizer, but the labels came with the lids, so I played along). Cactus dish by Sandy Siegel.

Arizona cutting board and cactus pitcher from Amazon, shot glasses from Tuesday Morning, and Arizona iced tea from the grocery store!

Arizona cutting board and cactus pitcher from Amazon, shot glasses from Tuesday Morning, and Arizona iced tea from the grocery store!

I used a rotating tray meant for turning heavy pots as a lazy Susan and added a cactus cookie jar from World Market; cactus measuring cups, measuring spoons, and salt & pepper shakers from Amazon. Mug is from Desert Botanical Garden gift shop.

I used a rotating tray meant for turning heavy pots as a lazy Susan and added a cactus cookie jar from World Market; cactus measuring cups, measuring spoons, and salt & pepper shakers from Amazon. Mug is from Desert Botanical Garden gift shop.

A few additional sources:

  • Face pot by Deborah Robin

  • Vintage mosaic tray from Soda Pop Vintage

  • My own stick-on photo tiles from Mixtiles

  • My Zazzle store (more products to be added)

  • Small cactus ring dish by Sandy Siegel

  • Desert Botanical Garden gift shop terracotta mug

  • Ecoart peel & stick tile backsplash

  • Black cabinet pulls

  • Cactus cabinet knobs

  • Cabinet paint colors: Valspar satin finish from Lowe’s, “Coral Peach” 2005-4B (upper) and “Elf” 6002-8B (lower)

 I’ll leave you with this “Before” photo as a reminder of where it all began!

Baby poop brown walls and melamine cabinets had to go!

Baby poop brown walls and melamine cabinets had to go!


In Cactilicious Kitchen, One Room Challenge Tags Cactilicious Kitchen, One Room Challenge, #oneroomchallenge, Better Homes and Gardens, #bhgorc
ORC-Gold-250w.png

One Room Challenge: Week 5 - Paint and More Paint!

Lori A. Johnson November 8, 2020

It’s Week Five of the One Room Challenge™ and the pressure is on! More happened behind the scenes than in front of the camera this week, but the great news is that everything I was waiting for has now arrived, and all systems are go for this coming week! The lone base cabinet I ordered a month ago from Home Depot arrived a week early, though I’m a little nervous about unboxing it and making sure it inserts easily into the space where the wine fridge used to be.

More importantly, I picked up my final paint colors from Lowe’s and actually started painting the upper cabinets and the small sections of wall that won’t be covered by the wallpaper mural I sneak peeked in last week’s post. I always knew the lower cabinets would be green, so after comparing a billion paint chips to the green in the mural - not so much to match, but to complement – I chose the Valspar color “Elf”, but mixed into Lowe’s exclusive Sherwin-Williams HGTV Home base paint instead of Valspar’s.

Prepped and primed with Kilz Adhesion primer for slick surfaces.

Prepped and primed with Kilz Adhesion primer for slick surfaces.

For the upper cabinets and walls, I solicited the help of my Instagram followers to help me decide between pink and peach, either of which would complement my wall mural. Though I strongly favored pink, my poll ended up 32% for pink and 68% for peach. After thinking it over and comparing various paint chips to the mural once again in an attempt to further justify pink, I decided to go with peach for several reasons of my own (poll results notwithstanding)!

Walls and upper cabinets getting a coat of “Coral Peach”.

Walls and upper cabinets getting a coat of “Coral Peach”.

First, the peach also complements the tiny flowers in the tiny tiles that make up the peel and stick tiles I chose for the backsplash. Second, there’s enough pink in the mural to dominate the color scheme already, so now I can justify adding pink accessories without it being overkill in the pink department. Third, with peach isolated to the kitchen, I can then go full tilt toward pink (and green… and purple…) in the adjacent dining/living area, whose kitchen doorway will nicely frame the mural from the outside looking in. Thus, the final result was the Valspar color “Coral Peach”.

Squint to see the tiny peach accents in the tiny peel and stick tiles!

Squint to see the tiny peach accents in the tiny peel and stick tiles!

I then set to work prepping and painting the frame of the upper cabinets, first by cleaning thoroughly with Krud Kutter Gloss-Off, which helps degloss the melamine surface for better paint adhesion. Then I primed with two coats of Kilz Adhesion, followed by two coats of peach paint. Even though it was nearing 11pm by the time that was done, I powered through and finished adding a second coat to all the small walls so I could toss the used tray and roller in the trash and never look at it again! Well, at least until tomorrow, when I start on the upper doors….

Ugh, I’m so over you!! Go away and don’t come back - until tomorrow…

Ugh, I’m so over you!! Go away and don’t come back - until tomorrow…

Upper cabinet doors are ready to paint - I’m over it before I begin!

Upper cabinet doors are ready to paint - I’m over it before I begin!

Speaking of the doors, the drilling of holes for handles was a success! I was a little nervous about the melamine surface shattering, but as you can see, the outside holes in front ended up perfect, and only the inside holes shattered a tiny bit, which will be easily covered by the handle screws.

Turns out you can drill holes in melamine - but carefully!

Turns out you can drill holes in melamine - but carefully!

Plans for this final week include: 

  • Priming, then painting the upper doors peach (I’ve already lightly sanded and deglossed)

  • Attaching handles and replacing doors once fully dried

  • Starting all over with removing, prepping and painting the lower cabinets/drawers green

  • Painting, installing a trash bin pull-out mechanism, then inserting the new base cabinet

  • Repairing the tile in front of the new cabinet

  • Installing the wallpaper mural

Wow, that’s a lot – will I get it all done in time for the final of six blog posts next week? Luckily, given the current pandemic situation and the delays in getting supplies, the ORC team has extended the final deadline to November 29th, but I want to be done well before then. We shall see….

In Cactilicious Kitchen, One Room Challenge Tags #bhgorc, #oneroomchallenge, One Room Challenge, Cactilicious Kitchen, painting melamine
ORC-Gold-250w.png

One Room Challenge: Week 3 - Finalizing Color Scheme

Lori A. Johnson October 22, 2020

Here we are in Week Three of the One Room Challenge™ and, while I haven’t made a lot of progress from last as far as manual labor goes, I have done quite a bit of mental labor and am finalizing the materials and color scheme for my Cactilicious Kitchen makeover. As I mentioned in last week’s post, I diverted from a commercially available wallpaper pattern to a custom mural based on one of my own photographs. The whole premise of this makeover is to use my own photos as decor wherever possible, so it just didn’t make sense to use someone’s else’s design on the wallpaper.

A moody little mood board for your consideration!

A moody little mood board for your consideration!

I’ve cobbled together a little mood board of sorts consisting of a few color samples atop the lone floor tile I found in the garage that will fill in the destruction of the floor that resulted from pulling out the wine fridge. Speaking of which, I decided to go ahead and fill the space with a stock cabinet from Home Depot, but it’s not due to arrive for a few weeks, so I’ll have to work around it for now. The smaller green cactus tiles are for the peel and stick backsplash, for which I listed the source in my Week One blog post (below).

Since the countertops are black, I’m bringing in black cabinet hardware, and although it’s very difficult to see from this partial low-res mural sample I printed at home, there is black running between all of the individual cactus blossoms, as well as peachy tones pulled from the terracotta tiles highlighting the pink petals (and, of course, some green as a nod to the cactus tiles!). You can see the brighter colors in the sample cabinet knob I had printed at Zazzle, which I may or may not use in some capacity. I did order a few other coordinating odds and ends from Zazzle and elsewhere that have not yet arrived.

As for paint colors, you can see the strips of green color chips from which I will choose a shade for the lower cabinets. For the upper cabinets, and the remaining bits of wall not covered by the mural, I will pull one of the warm pink colors shown here from the mural once it’s printed for a more precise color match.

Once I’m nearer to completion, I’ll list ALL the colors I ended up choosing by brand and name, as well as all of the sources for every last thing down to the Zazzle knob! Meanwhile, check out my Instagram “ORC” Highlights from Stories (@LAJphotos) for additional details as they’re finalized!

In Cactilicious Kitchen, One Room Challenge Tags Cactilicious Kitchen, kitchen makeover, #bhgorc, #oneroomchallenge, One Room Challenge, Better Homes and Gardens, Gardenography by LAJphotos
ORC-Gold-250w.png

One Room Challenge: Week Two - Priming and Planning

Lori A. Johnson October 17, 2020

It’s Week Two of the One Room Challenge™ and I don’t have a lot to report as far as blog-worthy visuals go. The most important progress arose via a scientific method consisting of equal parts contemplating, procrastinating, and shopping. However, I did get a significant chunk of actual work done by covering all the brown walls in one coat of primer, and I’m proud to report that the baby poop has been wiped clean! (I considered that as a headline, but didn’t want to attract the wrong crowd, if you know what I’m sayin’….).

The kitchen has brightened up considerably with a coat of white primer covering the brown walls, but don’t worry, it won’t be remaining white!

The kitchen has brightened up considerably with a coat of white primer covering the brown walls, but don’t worry, it won’t be remaining white!

Perhaps most importantly, I finally nailed down the image I want to have printed for a wall mural. The feature wall in question turns out to be almost a perfect square at 80 inches high by 84 inches wide, so I needed to find something that could be cropped to those dimensions without losing any substantial details. I also had to ensure it contained all of the colors from other kitchen features, such as the terracotta tile and black countertops I’m stuck with, but also the green peel and stick tile I’m using as a backsplash. I also needed it to serve as my final color inspiration for the rest of the walls, and possibly the upper cabinets (lower cabinets will be green). I think I accomplished all of that with the image I chose, but I want to keep it top secret, pending a dramatic reveal! (Hint: think pink.)

Future feature wall now coated with primer at left, and former home of the ill-fated wine fridge at center.

Future feature wall now coated with primer at left, and former home of the ill-fated wine fridge at center.

My other planning project for the week involved the mystery of the cabinet hole/broken tile I teased you with last week [above]. When the handyman came over to install my light fixture the previous week, I asked his opinion on whether the wine fridge I’ve never used in all the years I’ve lived here could be easily pulled out so I could use that valuable space for hiding the trash under the counter. Having a trash can out in the open has been the bane of this tiny kitchen’s existence, so I had a random “what if…?” moment and next thing I knew, we were dismantling the useless thing piece by piece and freeing it from its tiled-in prison. Welp, I guess it’s out for good now!

For a cabinet to fill that space in, I searched three separate used building supply stores for a base unit measuring 15 inches wide and with no drawer at the top so that I could fit a full size kitchen trash bin underneath. It seems that most commercially available under-counter pull-out contraptions are made for shorter bins to account for the drawer at the top, but as long as I have the whole height available to work with, why not take advantage of it? However, I did not find one of the right configuration, so I may have to bite the bullet and order a new cabinet from either Lowe’s or Home Depot, which puts a significant crimp in my miniscule budget. This is exactly what I need, if anyone happens to have a spare or knows of a cheaper source:

HD_cabinets.JPG

I also spent a fair amount of time researching replacement tile. In the eleventh hour, I found ONE of the existing 17x17 inch tiles in my garage storage room (thank you, previous owner, but couldn’t you have left me TWO?), so I was able to glean some identifying info from the back of the tile. Seems it’s made by Ceramica Falcinelli in Italy and of a type called “Gres Porcellanato”. However, it’s long since been discontinued, and I was unable to find anything that would even blend in. I have a plan, though it assumes we can get the broken one out without breaking it further. I will replace that with the “new” tile, then use cut parts of the partial tile to fill in the smaller holes. Is it even possible to get a tile out that big without breaking? I don’t know, but if not, it’s on to Plan C (C for more Contemplation).

That’s it for this week’s report. By next week, I hope to have found and installed a base cabinet, patched the tile, and covered the cabinets with a coat of primer. Oh, and I need to get my top secret wall mural printed! See you next Thursday!

Tags One Room Challenge, #oneroomchallenge, #bhgorc, Cactilicious Kitchen, Gardenography by LAJphotos
ORC-Gold-4oow.png

One Room Challenge: Cactilicious Kitchen

Lori A. Johnson October 8, 2020

What do massive photo archives consisting of cactus blossoms and assorted other weird succulents have in common with a DIY One Room Challenge® makeover, you might ask? Plenty! (Uhh, make that “Planty”?) One cactilicious kitchen makeover coming right up! Not only will it be extremely budget-friendly (ergo, mostly renter-friendly), I’ll also be incorporating custom touches using my own botanical photographs as inspiration throughout. With updates that are largely cosmetic, I won’t feel so bad about ripping it all out and starting over at a future date, once I return to post-COVID gainful employment. If you’re not familiar, the ORC requires a weekly blog post outlining that week’s progress for six weeks – this first post will be a bit longer than the next five, just to set the stage.

Potential new color palette consisting of peel & stick tile, paint, and a wall treatment, TBD…

Potential new color palette consisting of peel & stick tile, paint, and a wall treatment, TBD…

I’m a photographer and freelance garden writer, though, not an interior designer, so how did I get caught up in this crazy scheme to redesign a room? As it happens, the ORC’s call for Guest Participants went out just about the time I came up with a tentative plan, so I figured why not commit myself to public accountability while I’m at it? During this weird time of state-supported hermitry, more commonly known as COVID19 quarantine, I started making some small updates around my house while I had time on my hands and got a number of those annoying little “someday when guests threaten to visit you’ll be exposed and humiliated” tasks crossed off my list.

However, one major project I’ve never had any ideas for is the tiny galley kitchen I inherited from the previous owner back in 2007, with its nauseating baby poop brown walls, hideously outdated 80s-style melamine cabinets, and poor lighting. Since I’m not a cook, it’s basically just an easily ignored snack repository, and one good thing about the openings at each end is that they enable me to get a good running start with a carefully timed snatch and grab from the fridge on the way past, thus, minimizing exposure to the ugliness. I present to you as evidence:

Behold the dreariness of the kitchen design I inherited from the previous owner!

Behold the dreariness of the kitchen design I inherited from the previous owner!

Work with what you have! A concept comes together….

Once housebound for the duration, though, it could no longer be ignored. With zero budget to make any of the more substantial changes included in most kitchen renovations, I started thinking about what I COULD do, instead of what I couldn’t. I can’t replace the cabinets, but they’re in excellent condition, so I could paint them. I started researching best practices for painting over melamine and determined it could be done with the proper materials. Paint color is infinite, though, so I started sourcing the less accessible materials, first, then I’ll circle back and match up paint colors later.

I couldn’t replace the black Silestone countertops, either, so I had to find a way to justify their existence and make them work with a new color scheme and look intentional, instead of an eyesore. After all, I’m still stuck with the black appliances, which I can’t afford to replace, even though I’m in dire need of a new fridge (sadly, I can no longer store such basic survival necessities as ice cream, given my malfunctioning freezer that turns everything to mush). Ideally, I’d like to find a counter-depth unit that doesn’t protrude into the doorway, but alas, it’ll have to wait.

Above the countertops, the backsplash is currently just bare baby poop brown wall. Without a budget for ceramic tile and/or a contractor to install it, I scoured Amazon and other sources for weeks in search of a peel and stick tile alternative. I still have no idea how I stumbled upon my eventual choice, but I was pretty excited when I found these sheets of green tiles with, if you look very closely, cactus designs in many of the individual squares! They weren’t even labeled as such, I just happened to be searching for green after exhausting my options for pinks and purples, and voilà! There they were! Amazon had just enough remaining stock, so I snagged ‘em all before some other cactus poacher came along! [See first photo above.]

As for the brown wall, I had to brainstorm a color I could tolerate that also works with not only the black countertops, but also the existing terracotta tile floor that runs consistently throughout the entire lower level, which also can’t be changed. I came up with the brilliant idea of using peel and stick wallpaper that incorporates cactus green, black and terracotta. I ordered a half dozen samples from Spoonflower and had settled on the only one that made sense and wasn’t too busy, but I sat with the sample for nearly a month without ordering the full amount because there was something else about it that didn’t quite sit well with me…

For one, the wallpaper pattern was a little too… I dunno, precious? But more importantly, it wasn’t based on my own photos, my original raison d’être. However, I have no idea how to make my own repeating patterns from photos, and had no intention of trying to scribble up some rush-job abomination. After dwelling on this all summer, I suddenly had a lightbulb moment just last week – a mural! I mean, how obvious is that!? It’s only needed for one relatively small wall, and certainly can’t cost any more than wallpaper. I’m still looking for an appropriate image to use, though, so more about that in future posts.

Let there be light! What I’ve done so far….

After making a spreadsheet listing all the steps it would take to make this project happen, I started working on the ceiling, first. It’s pretty low, except for the recessed box that used to hold an ill-fitting jerry-rigged fluorescent tube contraption, which I had removed last year after the ballast died. At the time, I just had my handyman install an inexpensive integrated LED flush-mount light fixture as a placeholder, but it soon became apparent that the low wattage and overly warm light it emitted was not suitable for a kitchen. It also made the white cabinets look extra dingy (as if they needed any help)!

Nevertheless, not having any other brilliant ideas, I left it there until earlier this summer when I started researching light temperature, optimal number of lumens per square foot, and types of light fixtures. I needed something whiter, brighter, and closer to the bottom of the recessed box so the light could escape into the actual kitchen. After weeks of search-filtering and mind-changing, I finally decided on a Kichler semi-flush mount fixture from Lowe’s in which I could add any light bulbs I chose. I ordered 60-watt equivalent 4000K LED bulbs from Amazon and had the handyman come back last week and switch everything out. Now with the whiter and brighter light, I can finally see color accurately and will be better poised to make my final paint color choices.

Before the switch, though, I prepped the ceiling box while I could still access it without the new fixture in the way. When the original fluorescent tubes failed last year, I also removed the diffuser and its frame. With an otherwise low ceiling in the rest of the kitchen, I thought it would provide a small opportunity for added visual height if left open. However, the new fixture required cutting several holes in the drywall to move the wiring to the center, so between the drywall patches, the scorch marks from the old ill-fitting fixture, and the cracks and nail holes where the frame was, I had a lot of prep work to do! Between cleaning, sanding, patching, texturizing, and painting, I made about a dozen trips around the box over the course of two days and I was sure I’d end up in a permanent neck brace! Alas, I soon recovered, and I hope to extend the fresh white paint to the rest of the original off-white ceiling and down the walls by next week.

Recessed ceiling box, before/after repairs plus a fresh coat of Valspar Signature Paint + Primer in Ultra White.

Recessed ceiling box, before/after repairs plus a fresh coat of Valspar Signature Paint + Primer in Ultra White.

“Your health and well-being is the number one priority. Instead of going out and shopping, this is a great time to use what you have and let your creativity shine.”  ~One Room Challenge

So, with this quote from the ORC team in mind, I feel slightly less bad about being on an extreme budget, as I will definitely be using what I have, along with a fair amount of paint and plenty of cactilicious ingenuity. The final paint and accessory colors will depend on what I ultimately choose for my super top sekrit wall treatment! If you want to help me decide between my final selections, perhaps I could be persuaded to make a poll in future Instagram Stories… 😉

If you have any suggestions, insults, or emotional outbursts about any of the above topics, please feel free to add them in the comments either here or on Instagram at @lajphotos! Be sure to check out the other Guest Participant transformations on the One Room Challenge blog, as well. For now, I’m off to paint and deal with THIS last minute mystery project [photo below], which I’ll explain in next week’s post!

Last minute mystery space! Any guesses as to what’s happening here?

Last minute mystery space! Any guesses as to what’s happening here?

Tags #oneroomchallenge, #bhgorc, One Room Challenge, Fall 2020, Cactilicious Kitchen
LAJ Photography_06.jpg

Welcome to my blog, “Gardenography by LAJphotos”! I’m Lori A. Johnson, a nature photographer and freelance garden writer based in Phoenix, AZ.

PHGcover.jpg